Welcome to quake 3 arena
Get your gear and tools below
GUIDES
HOW TO MAKE A QUAKE III ARENA SERVER
CREATE A QUAKE 3 SERVER WITH PHARFRUMINSAIN PROGRAM
I am including all the versions of the server program, but the latest is just fine to use.
Flag and Frag Arena 2.0 (with Pharfruminsain banner)
Flag and Frag Arena 2.1 (with Pharfruminsain banner)
Flag and Frag Arena 2.2
(with NO Pharfruminsain banner) Click
here for full instructions
Additional useful information and screenshots below:
NOTE: The default Quake III port is: 27960
The below pictures and examples are written from v.2.0, but
the options are the same in all the versions.
If you install 2.0 or 2.1, you will be greeted with a Banner
when you run the program, this is normal and won't affect the
server performance. Version 2.2 has no banner when you start the
software.
Example of the Banner below if you installed v.2.0 or 2.1.
 |
Below is an example of a Dedicated server which can be used internally or externally. I chose "Dedicated" because I use it for my Internal network and the server can also be seen from outside my network, which means it's Public on the Internet.. I named my server GUINNESS, you can put your own name into the "Server Name" box. You may also put in a Message of the day. I chose to put Max number of clients or players to 15 (16 may be better to even out teams when you have team matches), you may want more or less. The RIGHT column with the Settings tab we will get to later, that is to configure your individual server maps. 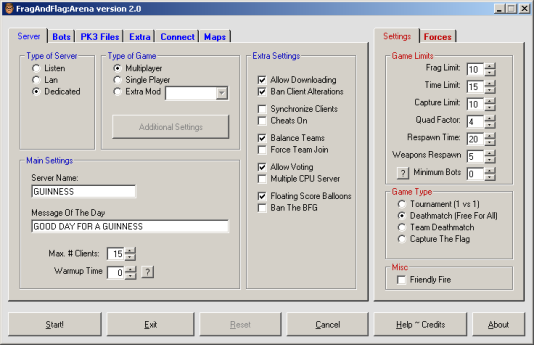 |
The below is an example of my BOTS settings, configure your bots here. You see the "Available Bots" on the left hand column which are the Bots available for your server. You can select a single Bot or multiple Bots and click the arrow to move it into the "Chosen Bots" column, now they will be included into the server as needed. Choose an individual Bot in the Chosen Bots" column and choose a "Skill Level: are the bottom, your choosing how good the Bot is going to be in the game. 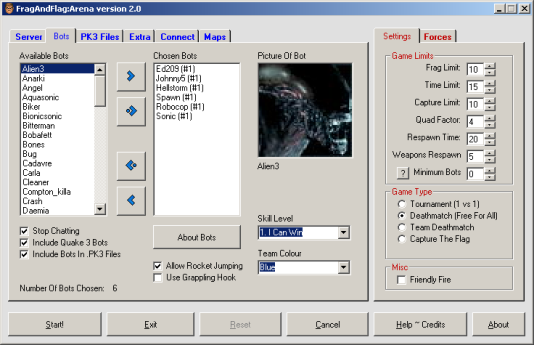 |
The below is an example of my MAPS and BOTS, you don't need to configure anything here. These are the additional Maps and Bots other than what comes default with the original Quake 3 Arena CD. 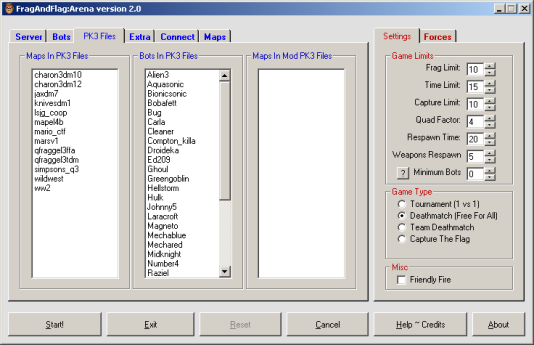 |
Below is an example of the EXTRA tab, you do not need to configure anything here if you wish. 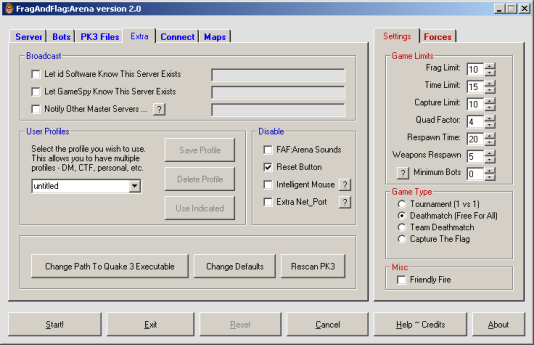 |
Below is an example of the CONNECT tab, here you configure your server IP address. Look at the "GET IP ADDRESS" button and click it, your server/PC IP address will show up in the textbox. There should be a "dot" in the Local Area Network" selection. Ports 27960 is the default and should not be changed. 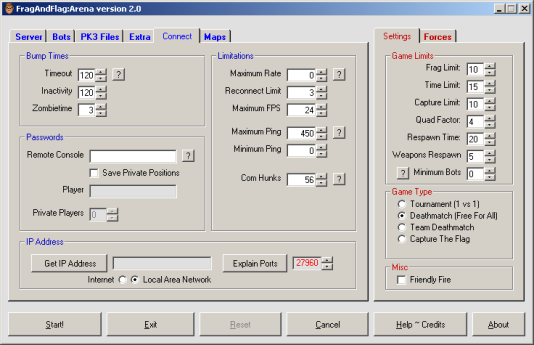 |
Below is an example of the Maps tab. Here you can put in the maps you want to play. The "maps available" simply shows you what maps are available. You need to choose a map from the "maps available" column and use the arrow buttons to move them to the "Chosen to be Played" column. Once the map is in the Chosen to be Played" column, you can configure the settings on the RIGHT side under the SETTINGS tab. Here you will choose the GAME TYPE FOR THE SELECTED MAP, such as Deathmatch and Capture the Flag. You also set the Frag limit, time limit and more. 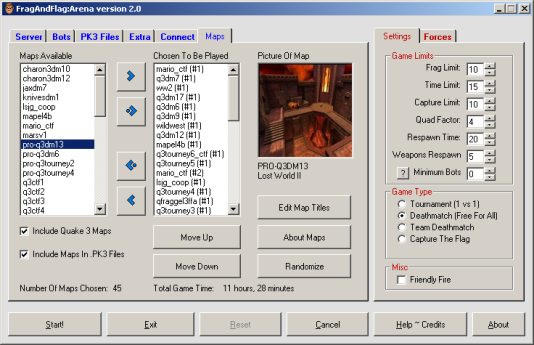 |
Once you have all your configurations, click START and the server will start up. Now you can use the same PC and start up Quake III and connect to your server by the IP address or just search it in Quake III. You can also go to other PC's on your network and connect also. That's it, happy gaming